Countless cables are used in the home — whether for charging smartphones, transferring data, or connecting audio systems. However, frequent use and regular bending can quickly lead to unsightly kinks or even damage to sensitive areas.
Caution is advised in the event of serious damage, such as a broken or exposed cable core: Repairs in such cases should be left to experienced users. For non-experts, replacing the cable is usually the safer option.
In other cases, however, anyone can attempt an uncomplicated repair: If the cables are only kinked or the sheath is broken, damaged household cables can be quickly repaired.
Find out here how you can easily repair kinked or broken cables — and even repair-damaged cable cores (conductors).
Repairing kinked cables: This is how it works
Bent or kinked cables are a typical occurrence in the home, and sometimes such cables are delivered completely bent: When manufacturers severely compress or twist them in the packaging for space reasons. If such kinks do not disappear on their own and cannot be straightened, there is a simple trick to help: the heat trick.
Plastic cables are thermoplastic. This means that the warmer they are, the easier they are to bend and move. In winter, you can therefore simply place bent cable sections on a warm radiator for a few minutes and then carefully straighten the bent section with your hands; the process can also be repeated several times if the cable is severely bent.
Note: Always disconnect the cable from connected devices or the socket beforehand and allow it to cool down after the process.
Alternatively, kinked cable sections (if not directly on the plug) can also be heated in a hot water bath and then smoothed by hand. However, this method requires special care: The plugs must never get wet and there is a risk of water ingress if the cable sheaths are porous. Make sure that the plugs remain dry — and remember to disconnect the cable from the power supply beforehand.
Both methods work best if you heat the cable to around 50 to 60 degrees Celsius. You should avoid higher temperatures.
Repairing a broken cable: Depending on the damage, only for experienced hobbyists
After the kink often comes the break, at least in cable management. A distinction must be made between two levels of damage: If only the sheath is broken, then the repair is child’s play and can be done quickly. However, if the cable core, i.e. the cable inside, is also damaged, it is a little more complicated. We only recommend such repairs to users with some experience. Headphone, audio, or charging cables can also be repaired inexpensively.
Important: If the cables of larger household appliances such as vacuums or lawnmowers break, laymen should not attempt to repair them and should leave the repair to specialized personnel.
How to repair a broken cable sheath
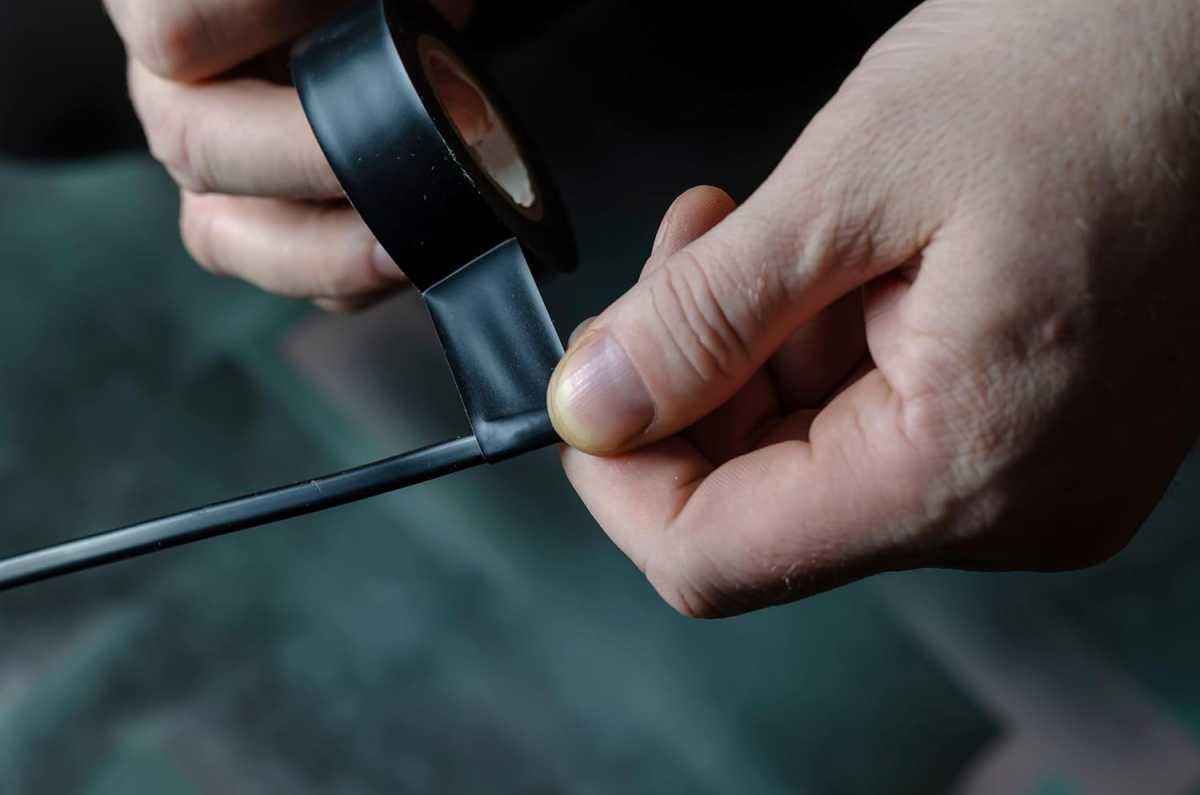
With older cables or cables that are used frequently (such as charging cables), it is often the case that the cable sheaths become cracked or break open completely. As long as the actual conductor inside remains undamaged, the problem can be quickly solved with some insulating tape. Such special tapes only cost a few dollars, and you can also find offers for them at the end of this article.
The damaged area can be easily repaired by wrapping two to three layers of insulating tape around it — and the cable is ready for use again.
Tip: Tighten the insulating tape slightly when wrapping to seal the damaged area more tightly and ensure better adhesion. Alternatively, heat-shrink tubing (see below) is suitable for sealing open cable sheaths quickly and reliably.
Repair the cable core in just a few steps
If cables from low-current devices (up to 50 volts) break, you can also try to repair them at home. Proceed as follows:
Disconnect the cable: As a first step, pull the cable plug out of the connected appliance or power source.
Find the damage: Now locate the damaged area — in most cases the break is obvious.
Cut out the damaged area: You can then use a wire stripper or cable cutter (see below) to cut the damaged area out of the cable. If necessary, you can also use a cutter knife. Try to work evenly and cut the cable cleanly.
Expose the conductor: Strip the two new ends of the cable to a length of about one centimeter. The wire stripper is perfect for this.
Reconnect the ends: Now reconnect the separated cable. This works best with crimping pliers, but you can also twist the conductors together by hand and wrap them with insulating tape. Heat-shrink tubing is a particularly clean and safe way to do this.
If you do not have this equipment in stock, you will find suitable purchase recommendations at the end of the article.
Prevent cable breakage or kinking with simple tricks
Annoying cable breaks or kinks in sensitive areas can be avoided with a simple trick. The weak point is usually at the transition to the plug — exactly where the fixed plug joins the flexible cable. The load is particularly high at this point, which is why damage often occurs here sooner or later.
To prevent this, you can reinforce the area, which is easy to do with some insulating tape. Simply wrap two to three layers of tape over a length of two to three cm of the cable sheath at the sensitive point. The cable end then remains flexible, but no longer bends so much under load that you have to fear a cable break.
Tip: Instead of tape, you can also use the nib of a biro at this point. To do this, simply open an old biros, pull the nib off the lead, and wind it over the sensitive end of the cable.
Useful equipment for cable repair
With these tools, you can make broken cables functional and safe to use again in no time at all or reinforce sensitive areas.
Insulating tape black PVC 19mm x 20m

Erko
Price: $1
Stretchy, thick, and flexible to use: A roll of insulating tape belongs in every household. This inexpensive tool reliably and securely seals open cables and is helpful or even necessary for many of the repairs described in this article. You can find the tape in a variety of colors and also a narrower version measuring just 15 × 10mm.
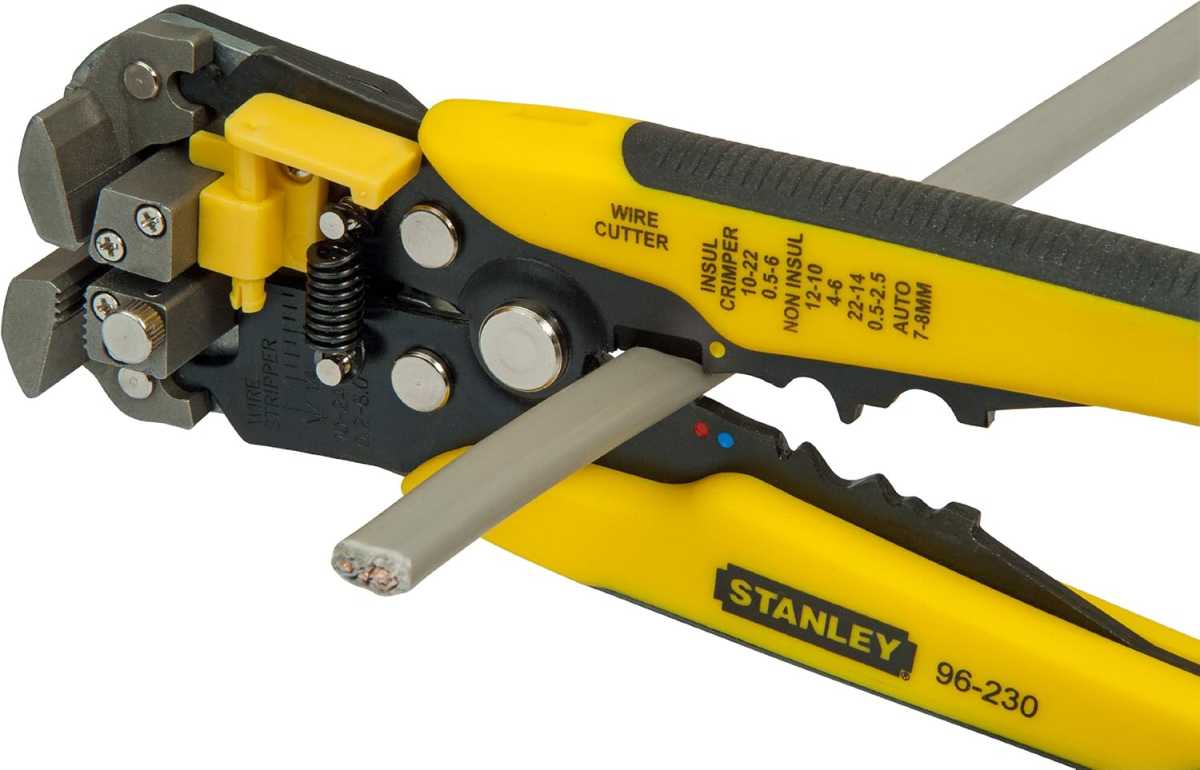
Stanley FatMax automatic wire stripper and cutter

Stanley
Price: $39
Powerful tool for working with cables: This multi-tool can strip cables (0.2 to 6 mm²) or cut them cleanly. Cable conduits can be quickly and easily pulled from the conductor core (stripped) so that the ends can then be reconnected and re-insulated.
The robust pliers are well made and offer a secure, non-slip grip.
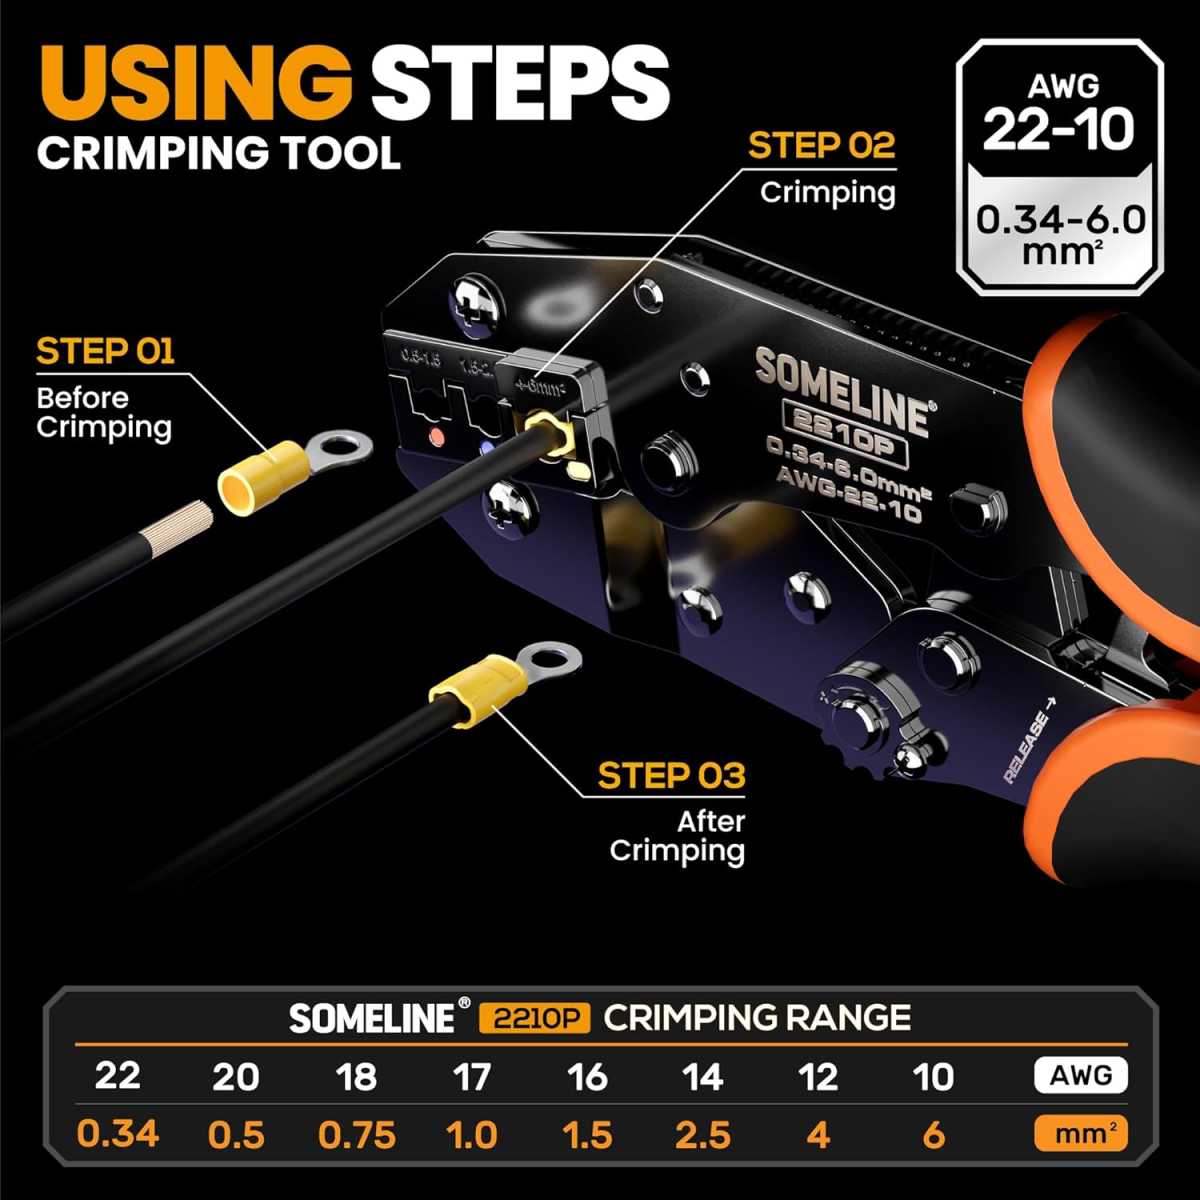
Someline crimping pliers cable connector set

Someline
Price: $17
Crimping pliers are the best tool for reconnecting exposed and separated cable cores. With this practical tool, you can press cable sleeves firmly and securely onto the open cable points, ensuring that the new insulation holds reliably.
The package already includes three different butt connectors for different conductor cross-sections. After crimping, you can shrink the cable sleeves with a heat source (such as a lighter) so that they adhere inseparably to the cable.
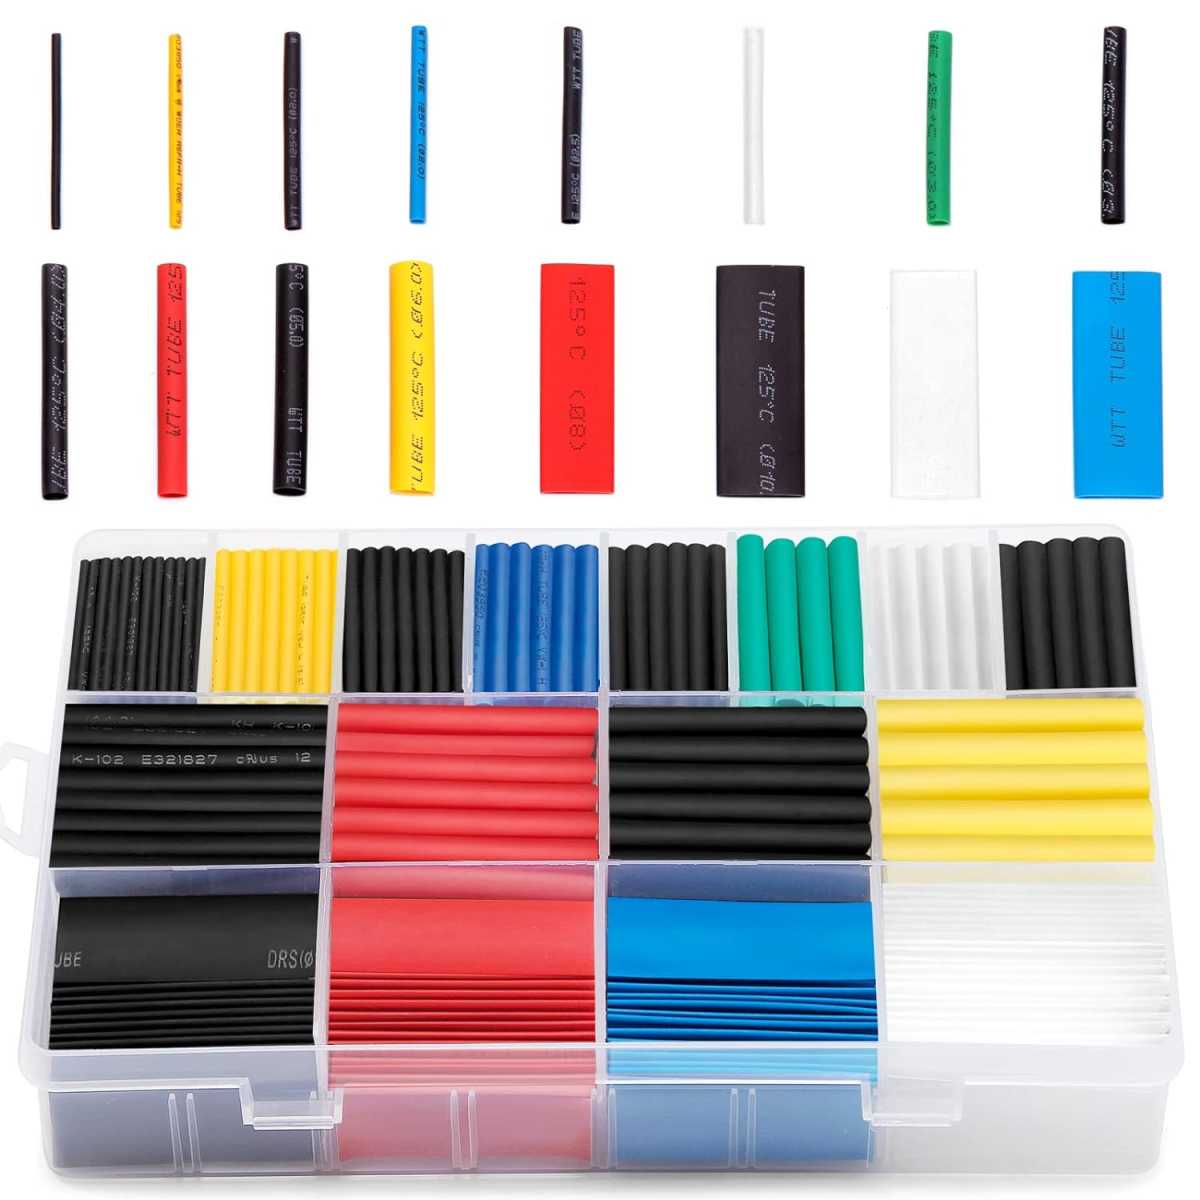
Heat-shrink tubing set with various sizes, 580 pieces

Amazon
Price: $7
Heat-shrink tubing in all standard sizes can be used to seal damaged cable sheaths or safely insulate newly connected cable ends. To do this, simply pull the appropriate heat-shrink tubing over the affected area of the cable. When heated, the material shrinks and adheres firmly and inseparably to the cable sheath.
A heat gun is best suited for heating, but if you are careful, you can also simply use a lighter.
This article originally appeared on our sister publication PC-WELT and was translated and localized from German.