The tempting idea of traveling lightweight is rarely easy as a photographer. It doesn’t take much – just an extra lens here, a sturdier tripod there – and your bag suddenly weighs as much as a bull elephant. While I can’t totally cure your PEES (Packing Excessive Equipment Syndrome), my tip today may help you take the first step to recovery. If you don’t want to carry your laptop with you in the field, try backing up your photos to a hard drive directly via your smartphone instead.
I probably don’t need to explain why backing up your photos while you travel is a good idea. Personally, I’ve learned through bitter experience – in my years of photography, I’ve experienced card failure, dropping my backup drive, and even theft. These risks are mitigated (though not eliminated) by doing regular backups.
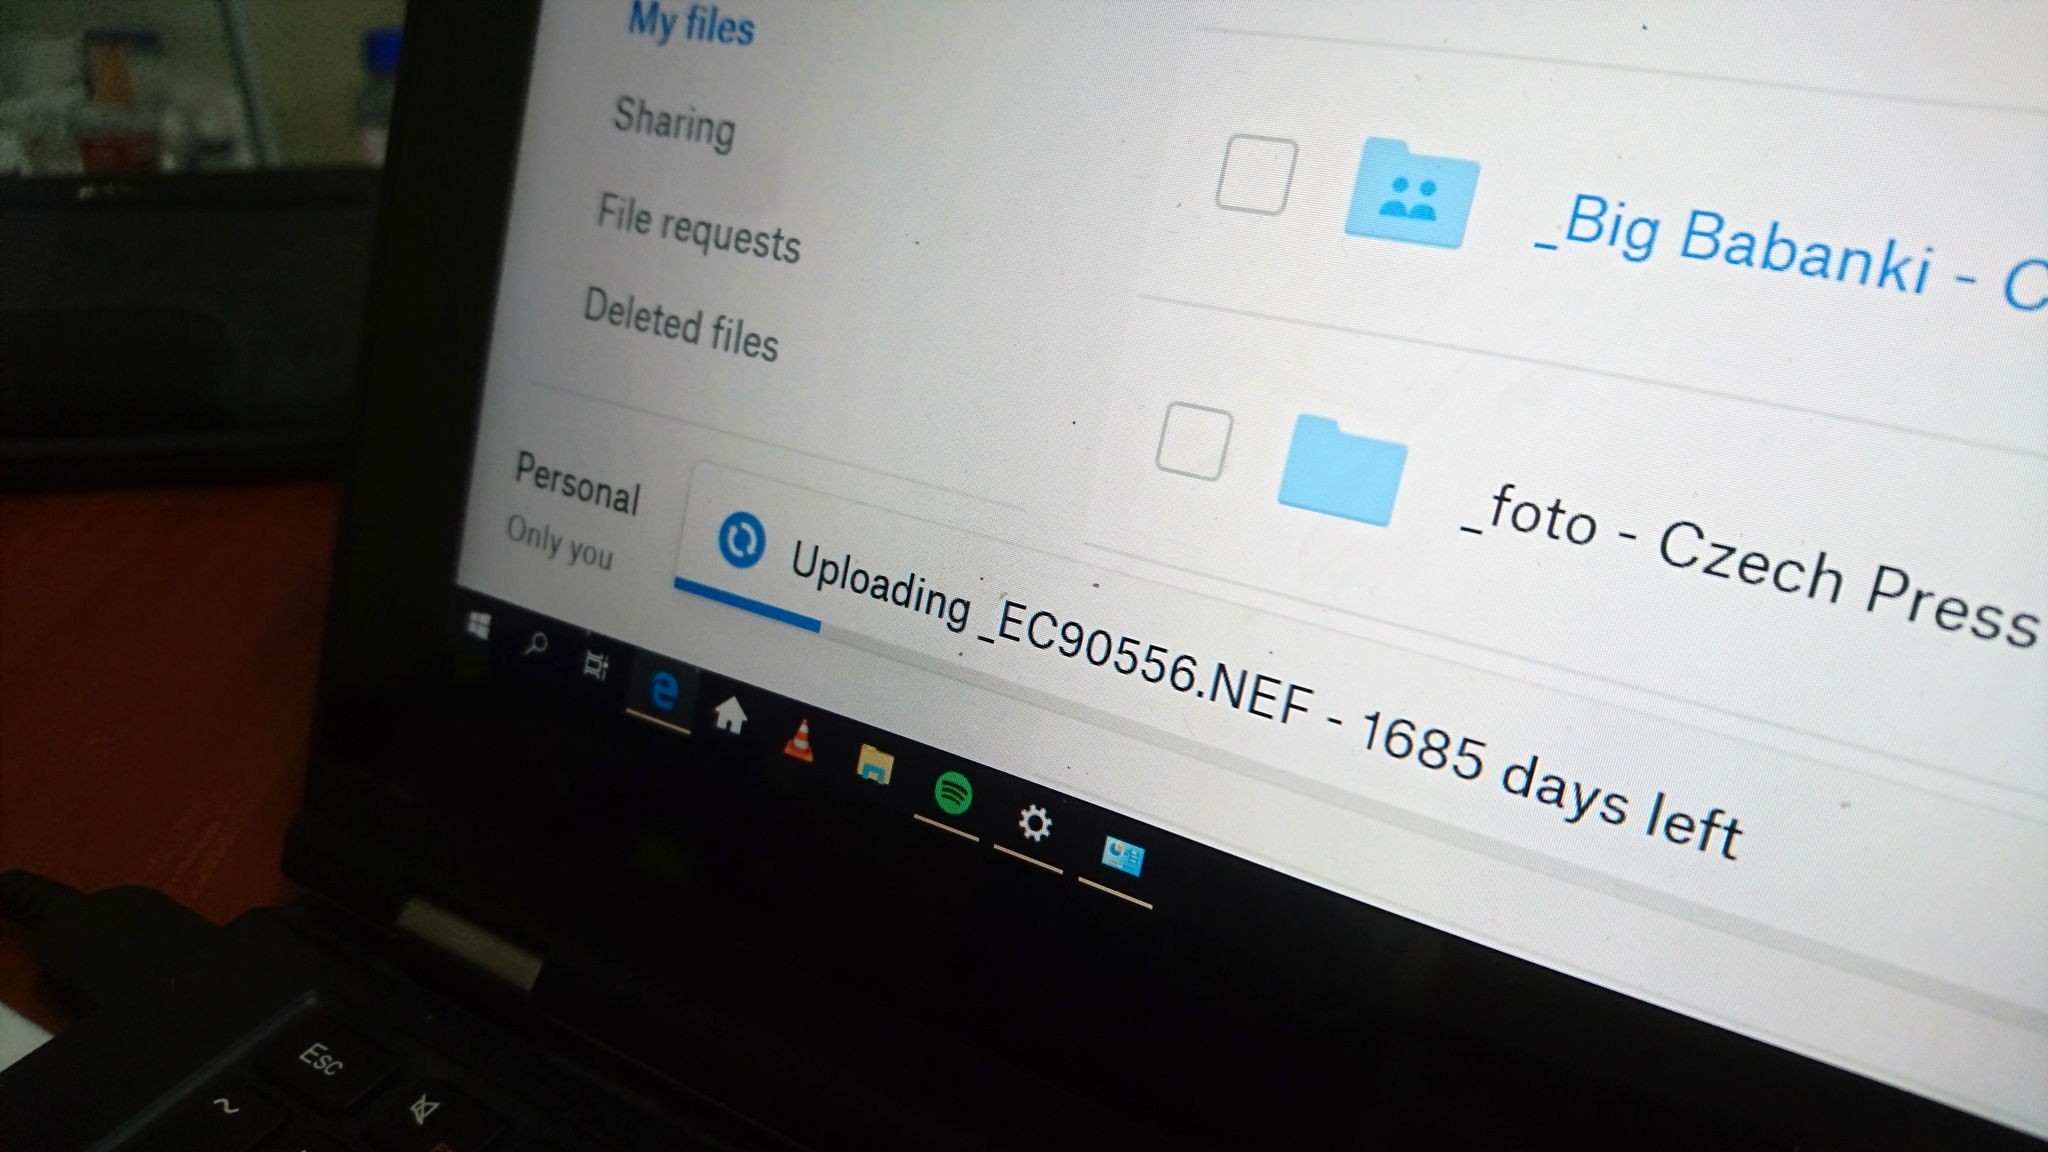
In the field, this means using an external hard drive or two – no way around that. Unlike at home, when you may be able to rely on a cloud backup system, that rarely works in the field. I think the futility of this method is nicely demonstrated by my friend Tomas Grim’s efforts to push his photos to Dropbox while traveling in South America…
Ultimately, I came to appreciate that the best backup strategy on the road is to use a pair of rugged SSDs, onto which I transfer my photos at the end of each day. I keep one drive at the hotel and take the other with me wherever I go. It’s a great solution that keeps my photos nice and safe.
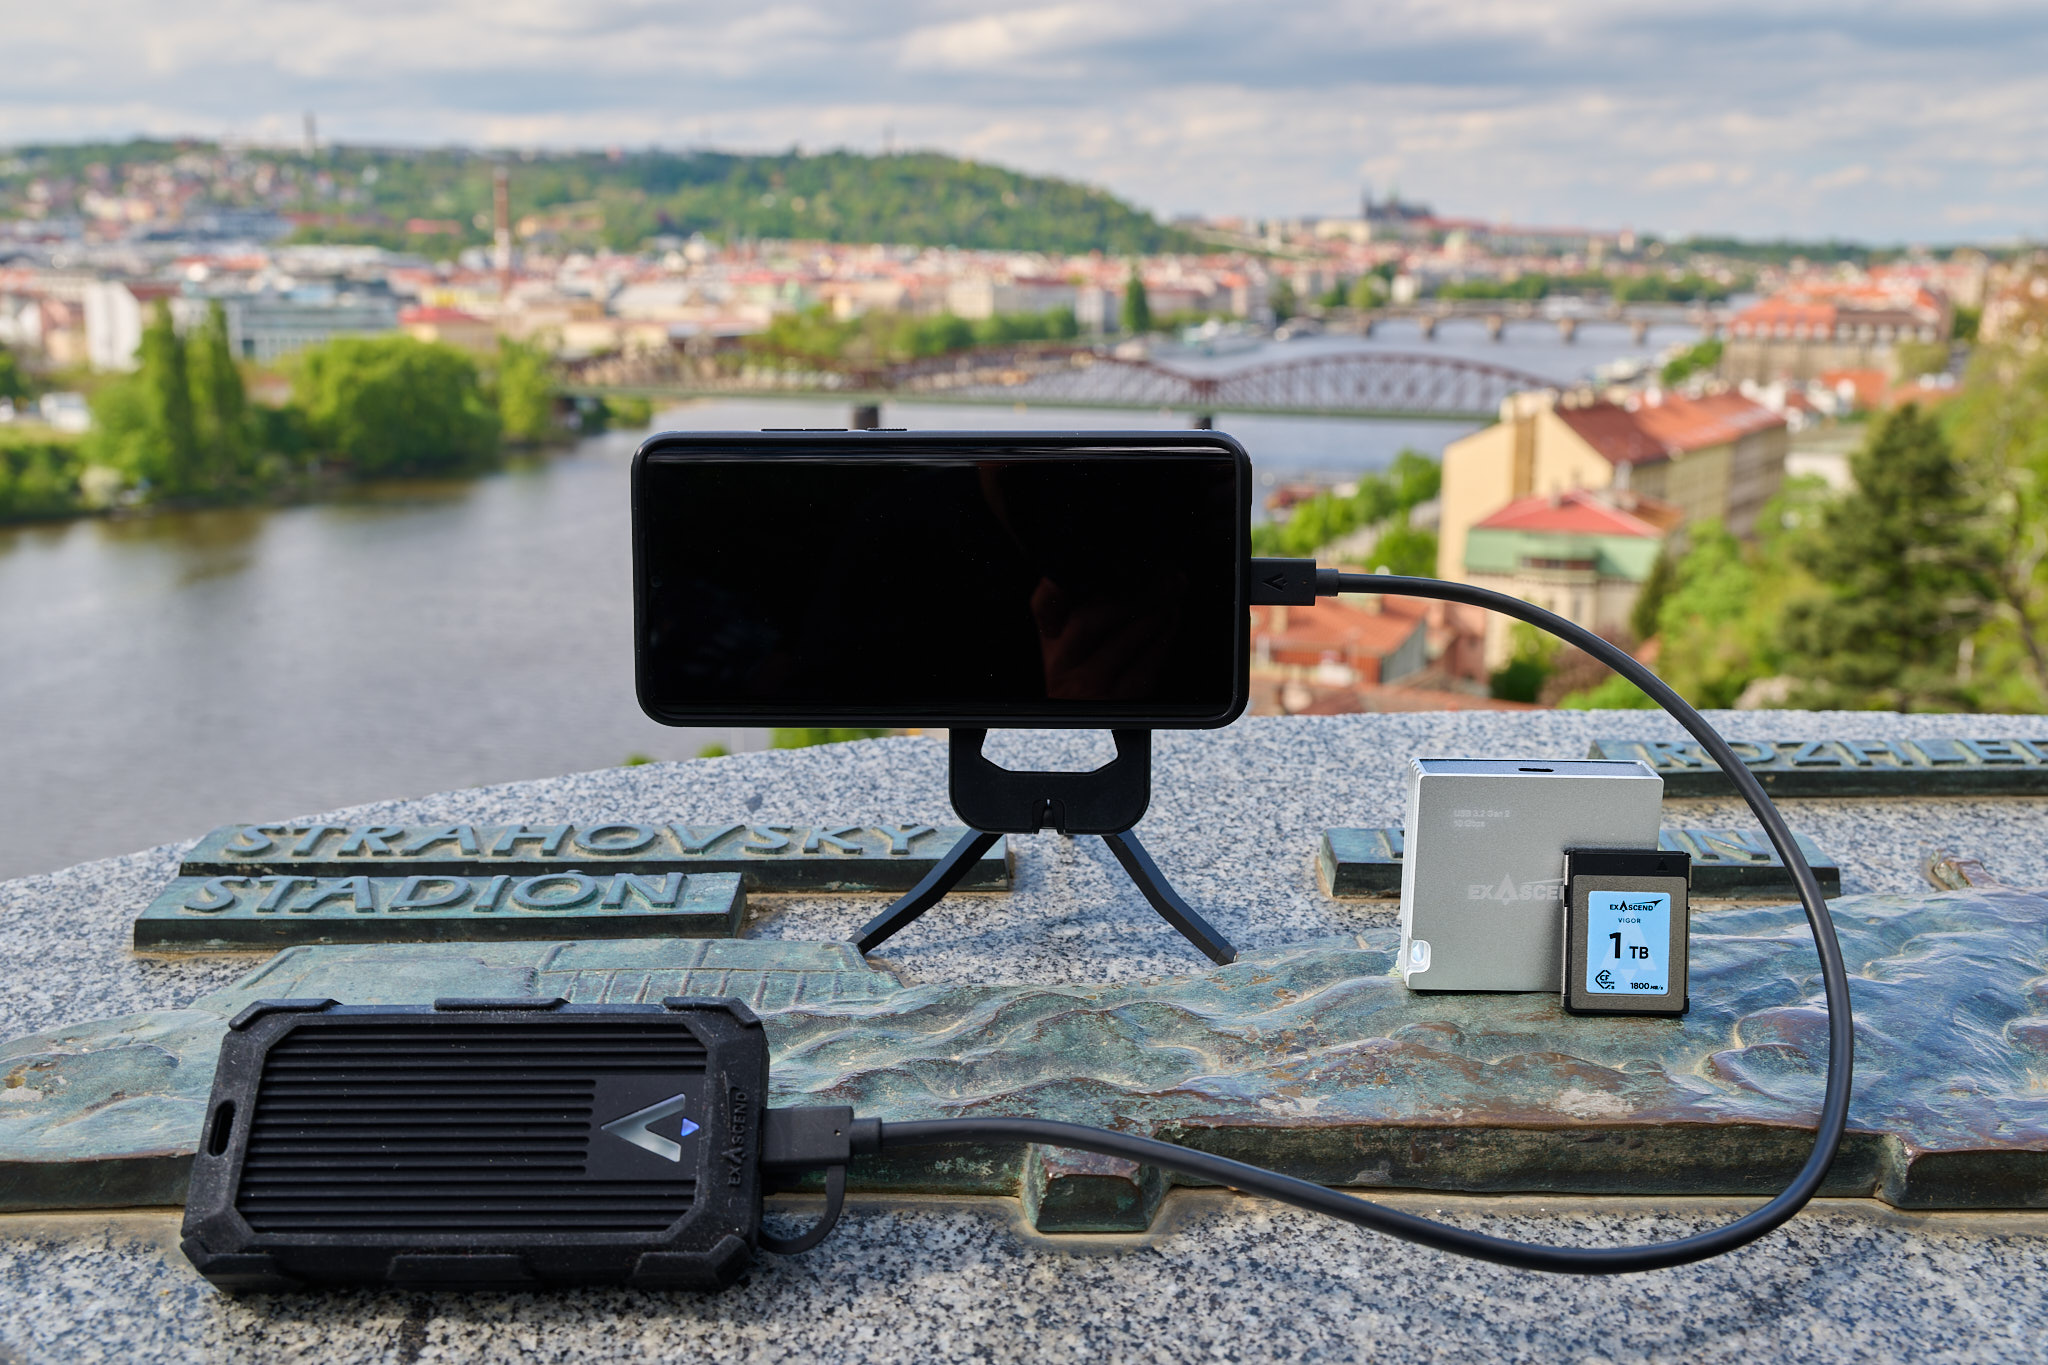
The only thing left to figure out is how to get your photos from the memory card to the SSD. Of course, a computer works great for this – but what if your laptop breaks while you’re traveling, or you want to leave it at home in the first place in order to travel light? That’s where your phone can step in.
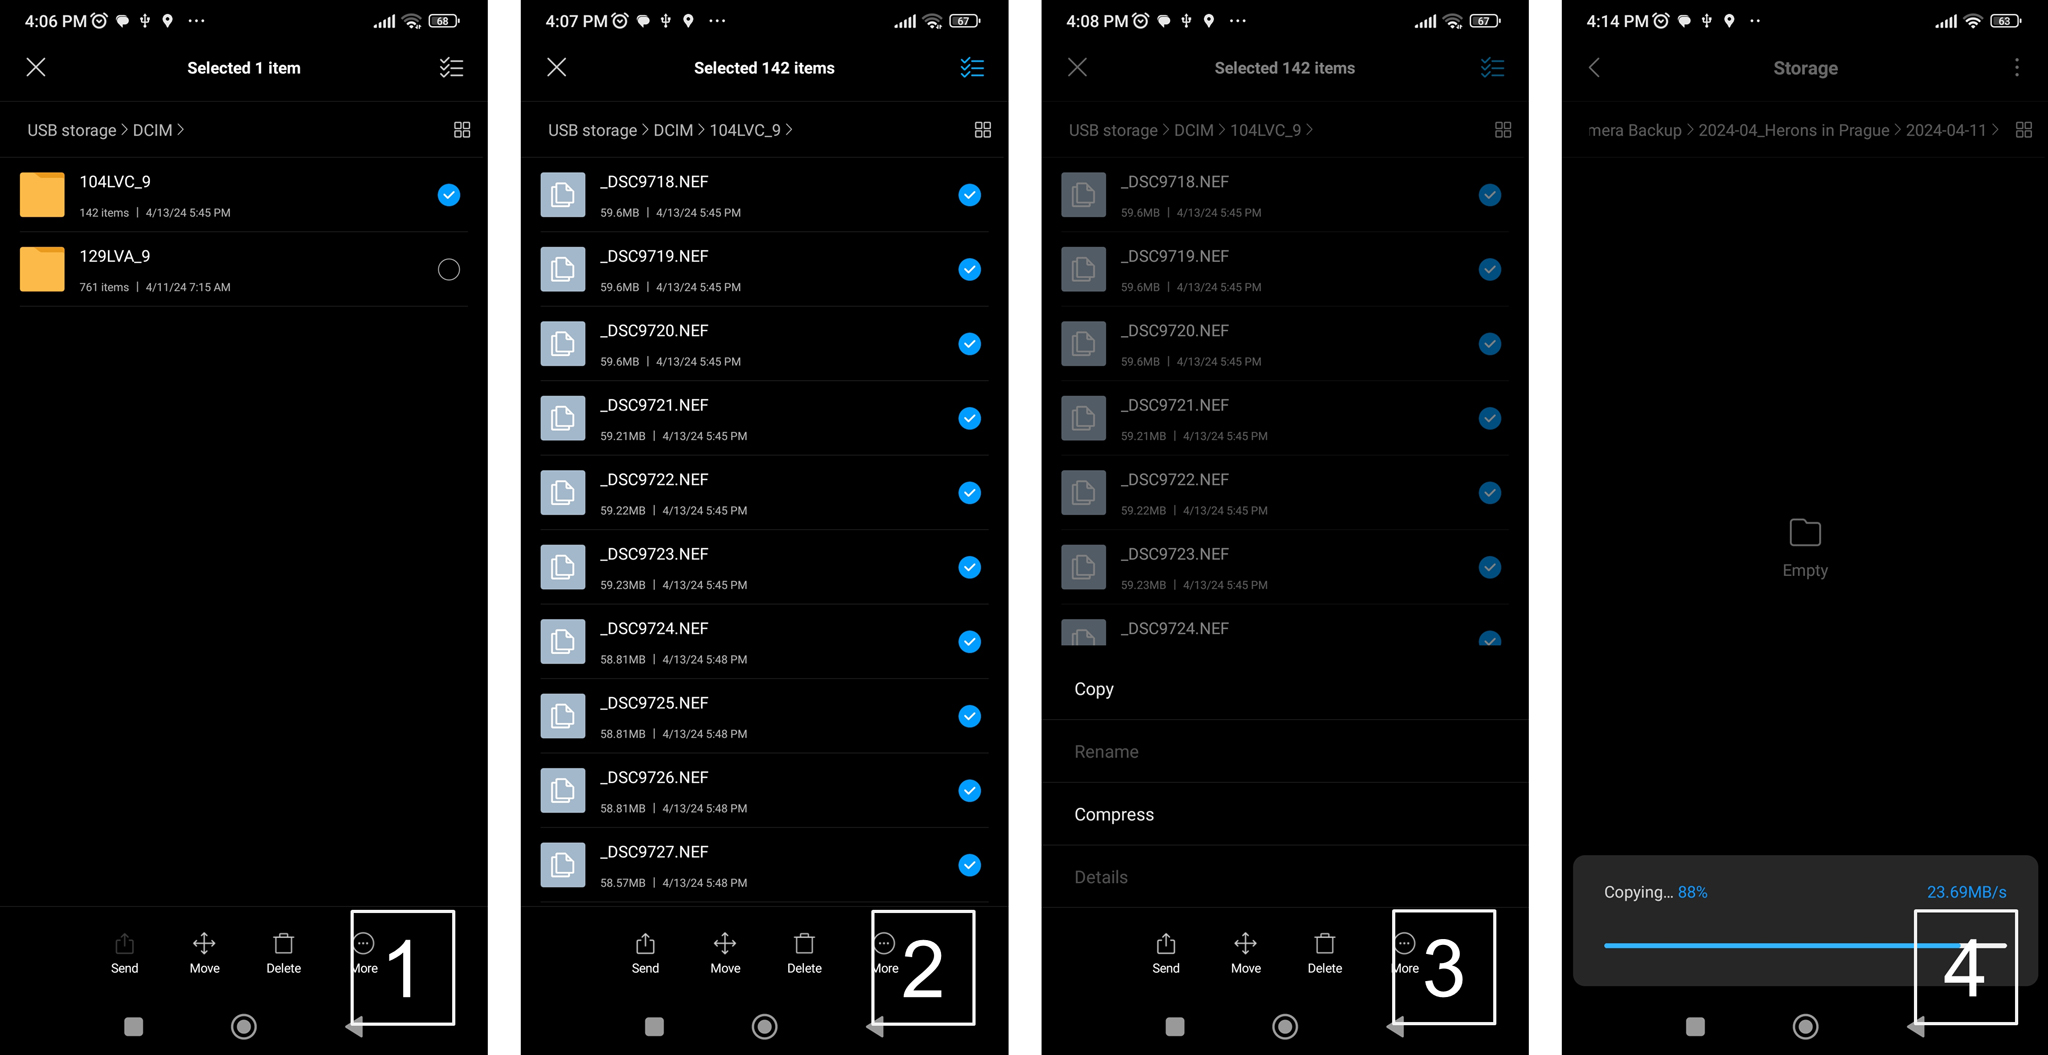
You are essentially going to take the photos from your memory card, put them on your phone, and then transfer them off your phone onto an SSD. The whole process looks like this, in a nutshell:
- Connect a card reader with a memory card to your phone (applies to Android and to newer iPhone with USB-C. For other iPhones, see my note after these steps.)
- Copy the photos to a folder in the internal memory of the phone (name it Camera Backup, for example).
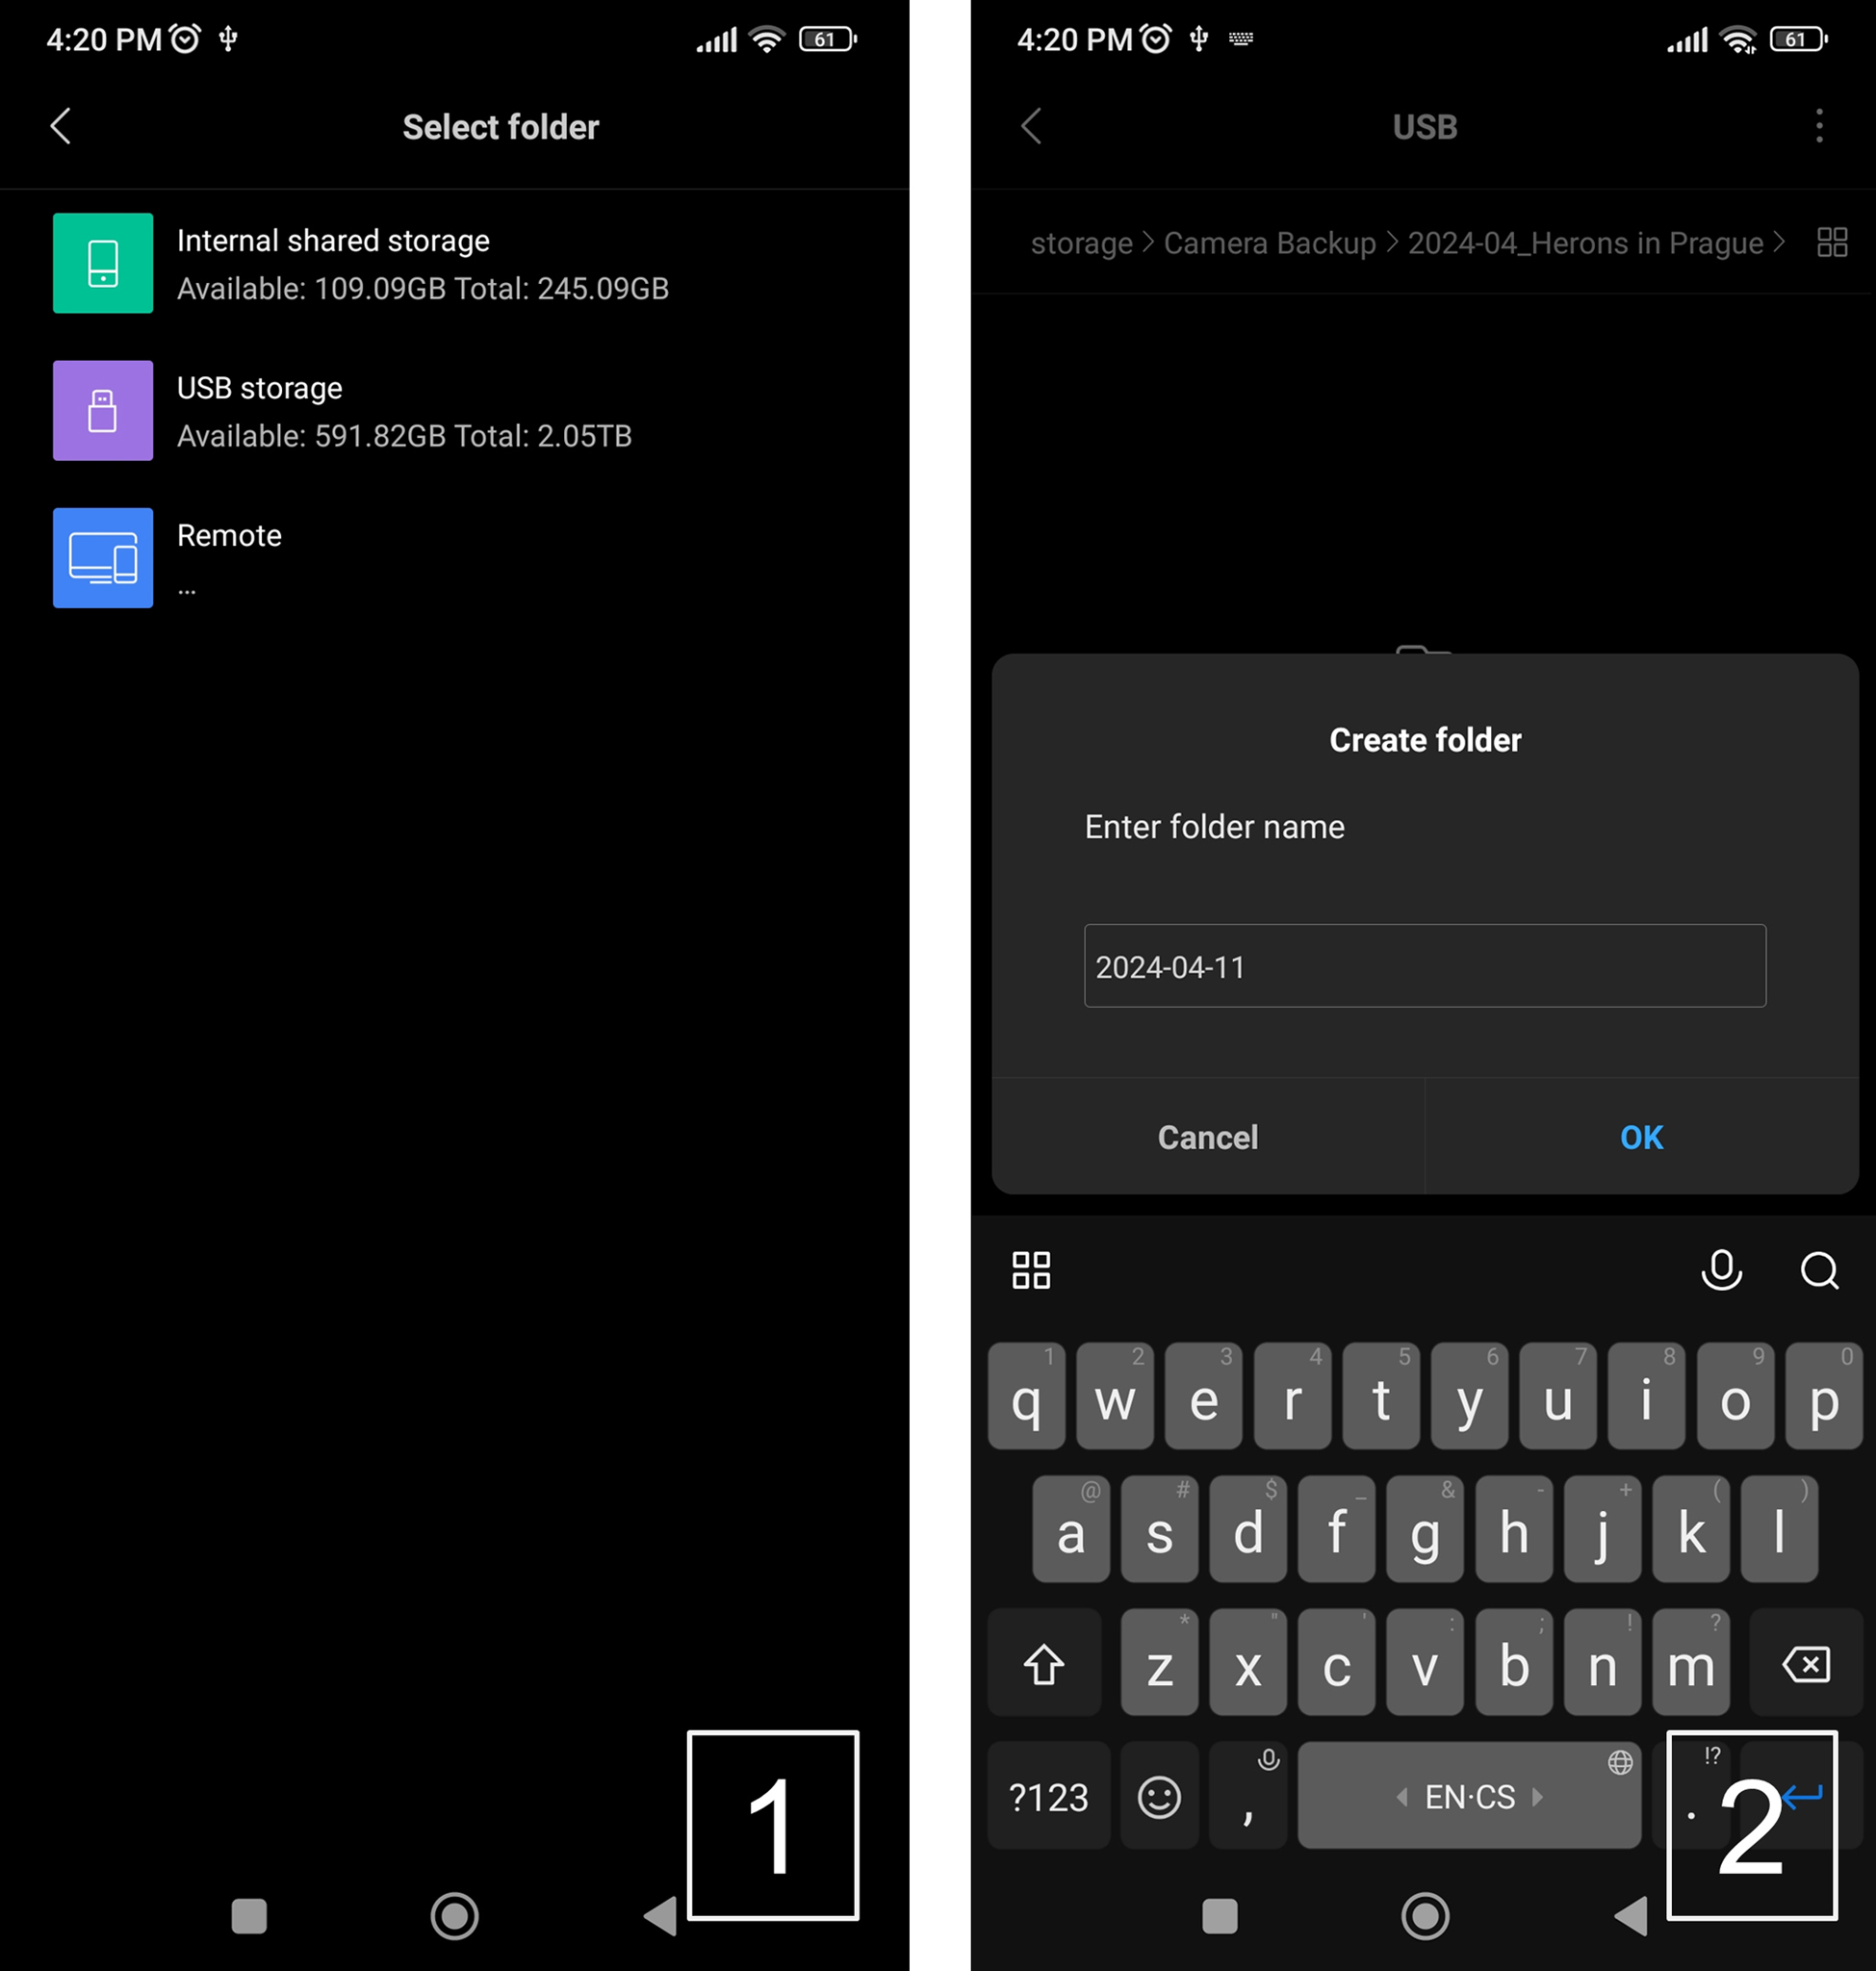
- When that’s done, disconnect the card reader and connect your first SSD (I will call it “SSD 1”).
- On SSD 1, create a main folder with the name of your trip (e.g. 2024-04_Europe) and a subfolder containing the date of the backup (e.g. 2024-04-11).
- Copy (not move) the photos in your phone’s Camera Backup folder into this new folder on SSD 1.
- When that’s done, disconnect SSD 1 and attach SSD 2. Repeat the steps above, but move the photos rather than copying this time. This will neatly remove them from your phone.
- The backup is now safely stored on both SSD 1 and SSD 2! Remember to keep SSD 1 in a different location than SSD 2. Do this each day of your trip to have an up-to-date backup.
Although the process itself is pretty easy, there are a few technical details that I want to address before concluding this article. First, let me expand upon the note I mentioned in Step 1 regarding iPhones.
If your iPhone has a Lightning port rather than a USB-C port, you can’t just plug a memory card reader directly into the phone. Instead, as long as your camera writes to a standard SD card, you should use an SD card reader made for Lightning ports instead. This one from Apple is only $29.
On the other hand, if your camera doesn’t write to regular SD cards (like my Nikon Z9 or the original Nikon Z6/Z7 that only write to CFExpress or XQD), your process will be significantly more complicated. You will need a Lightning to USB-A adapter, a USB-A to USB-C cable, and a power supply for the adapter. It works, but it’s fiddly. I think it’s easier just to bring your laptop at that point, instead of trying to make it work with your phone.
I also want to mention the importance of having free space on your phone’s internal memory. If your phone only has 10 GB of free storage, and you try to transfer 20 GB of photos, you will run into problems before you ever get the chance to pull an SSD out of your bag.
The good news is that this issue isn’t as big as it may sound. Since you’ll be backing up daily, you only have to deal with the amount of photos taken in 24 hours, not during the whole trip. And these photos don’t stay on your phone for long – just long enough to transfer them onto an SSD. However, if you shoot a lot of video, or you’re a burst-happy wildlife photographer, just be aware that backing up via your phone may not be right for you.
By the way, if your phone allows expandable storage, you might consider getting a 1TB MicroSD card for it. These days, many 1TB MicroSDs are available under $100, and that should be plenty for the number of photos that you might capture in a day.
Lastly, if you’re wondering about the speed of data transfer through this whole process, the answer is that it depends! Even phones with USB-C do not all have the same transfer speeds.
For example, my Xiaomi Mi Note 10 smartphone uses the older USB-C 2.0 standard. When I tested it, I was able to transfer 7.9 GB of photos in 5 minutes, 50 seconds (about 23 MB/s). Transferring the same photos from the internal memory to the SSD took 7:23 minutes (about 18MB/s). That’s a total of 13 minutes, 13 seconds, and I was only transferring 144 14-bit lossless compressed RAW files from my Nikon Z9.
But wait! If your phone uses the faster USB-C 3.2 Gen 2 standard, like many of today’s smartphones, it will be much faster. When I tested moving the same photos to the iPhone 15 Pro, it took only 1 minute, 39 seconds (82 MB/s). Then transferring them to an SSD took just 44 seconds. So, the cumulative backup time was just two minutes, 23 seconds. That’s hardly slower than it would have been on my laptop.
I want to point out that your USB cable needs to support sufficiently fast transfer speeds. For example, even with the iPhone 15 Pro (a USB-C 3.2 Gen 2 phone), Apple only includes a cable in the box that supports USB 2.0 transfer speeds! If you’re getting slower transfers than expected, the cable, not the phone, may be to blame.

And now, your precious photos or videos are safe. So is your computer, which you can leave at home – good for preventing thieves and preventing PEES.
What are the downsides? The big one is that this technique is only fast and easy to use if you have the right combination of phone and camera. If your phone only supports USB-C 2.0 transfer speeds, or doesn’t have enough free space, it’s may not be worth bothering with this method. Also, if you have your laptop with you anyway, it’s still quicker to back up photos to SSDs using your laptop than your phone.
Even with those drawbacks, I believe that backing up photos to a hard drive via your phone is a very viable option. If nothing else, it’s good to have this technique in your back pocket in case your laptop breaks while you’re traveling. If there’s one thing you shouldn’t skimp on, it’s keeping your photos backed up!